
How to plan and publish a teaching schedule
Prepare lessons for a week or month, check teachers and rooms, then apply the finished schedule. While you edit a separate version, the active schedule remains available to staff and students.
What happens when you publish the schedule
Publishing the schedule creates the initial lesson charges. Attendance marks and billing treatment can change those charges later. Before publishing, check the group, lesson type and teacher as well as the lesson time.
From a draft to a published lesson
Watch the schedule workflow: prepare a lesson, resolve a conflict, change its time, publish it and check the related student invoice and teacher payout.
Class Scheduling Software for Language Schools | Conflicts, Billing & Payouts
Before you start
Add teachers, groups or students, lesson types and rooms for classroom lessons. Set prices so you can check student charges. If you use teacher payouts, enable that feature and configure the teacher rates.
From the active schedule to published changes
First review the published lessons. Then prepare changes in a separate version and apply it after checking the plan.
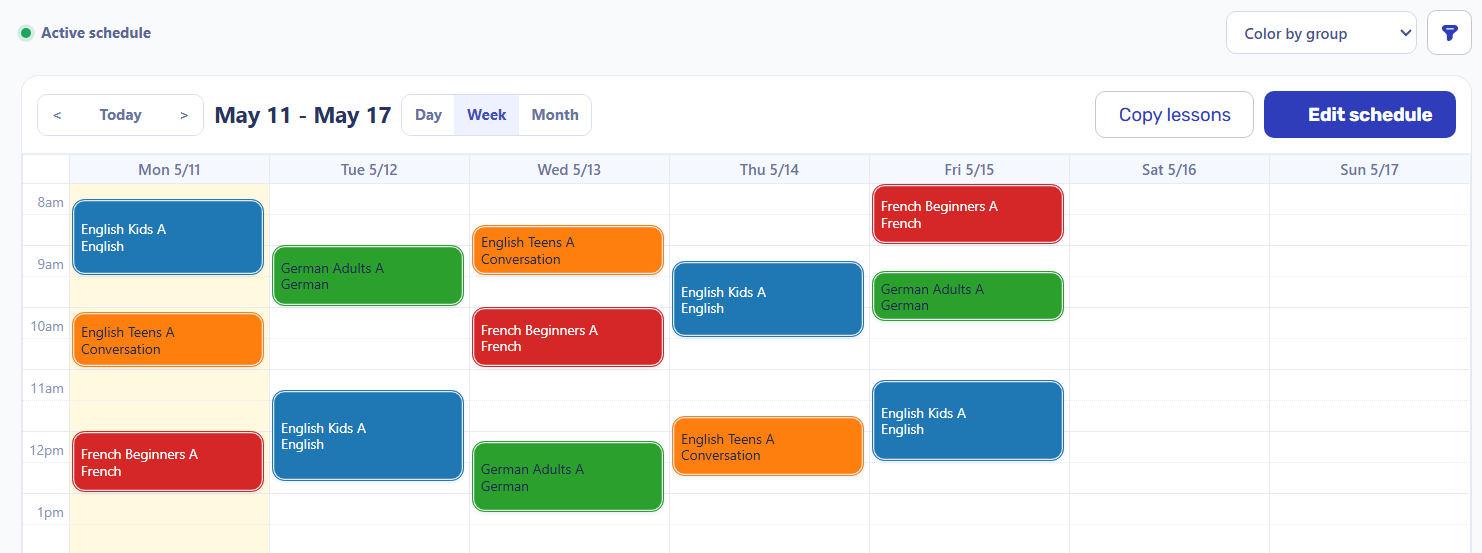
Open the active schedule
Open “Schedule” and choose the week you need. In “Active” mode, check the published lessons: dates, times, groups, teachers and rooms.
- Use filters when working with several groups or teachers.
- Use the color options to find the lessons you need before preparing changes.
Switch to editing
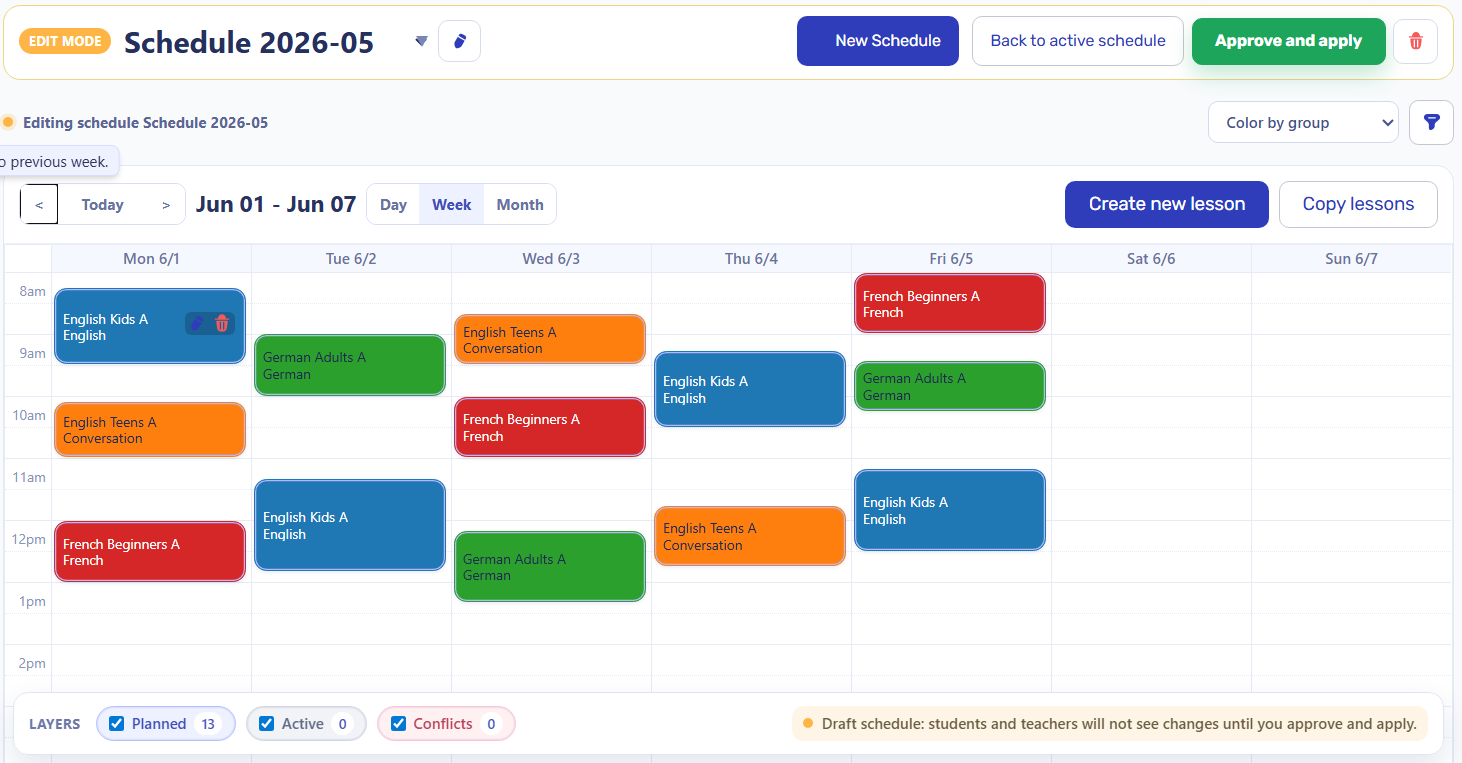
Click “Edit schedule”. Select an existing version or create one with “New Schedule”. Give it a clear name, such as “November — evening groups”.
- Editing mode works with a draft.
- Students and teachers see the changes after you choose “Approve and apply”.
Create or edit lessons
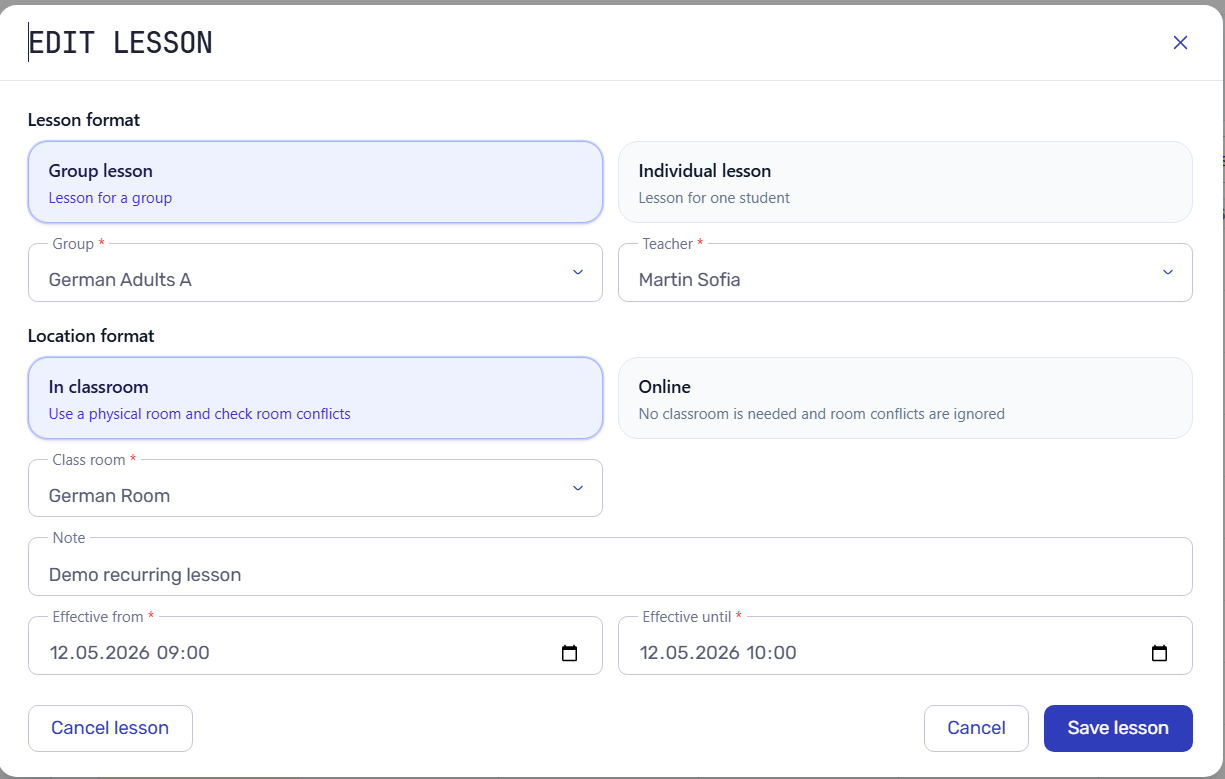
Open the lesson form. Choose “Group lesson” and a group, or “Individual lesson” and a student. Select a teacher, “In classroom” or “Online”, and the date and time. For classroom lessons, choose a room; for individual lessons, choose a lesson type. Add a note if needed.
- Check that you selected the correct group or student.
- Check the group price; for an individual lesson, check the price of the selected lesson type.
- Check teacher and room availability, the date and lesson duration.
- Click “Create lesson” when adding a lesson, or “Save lesson” when editing one.
Copy recurring lessons
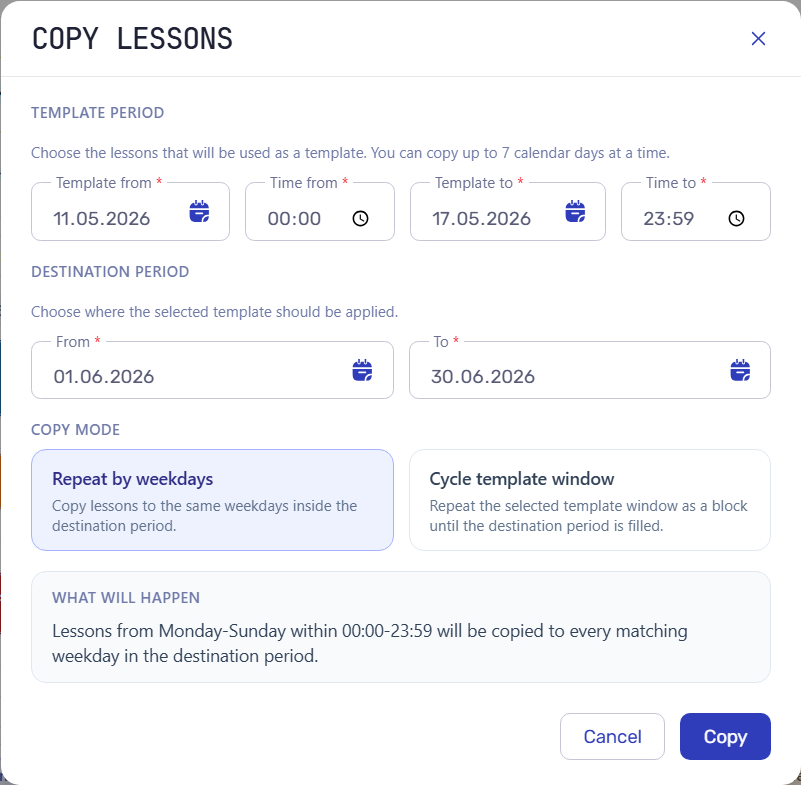
In the selected version, click “Copy lessons”. Set the template period, time range and destination period. The template can cover up to seven calendar days per operation. Choose a copy mode and click “Copy”.
- “Repeat by weekdays” copies lessons to the same weekdays in the destination period.
- “Cycle template window” repeats the selected template as a block until the destination period ends.
- Check the copied lessons, especially the start and end of the period, holidays and exceptions to the usual schedule.
Resolve conflicts
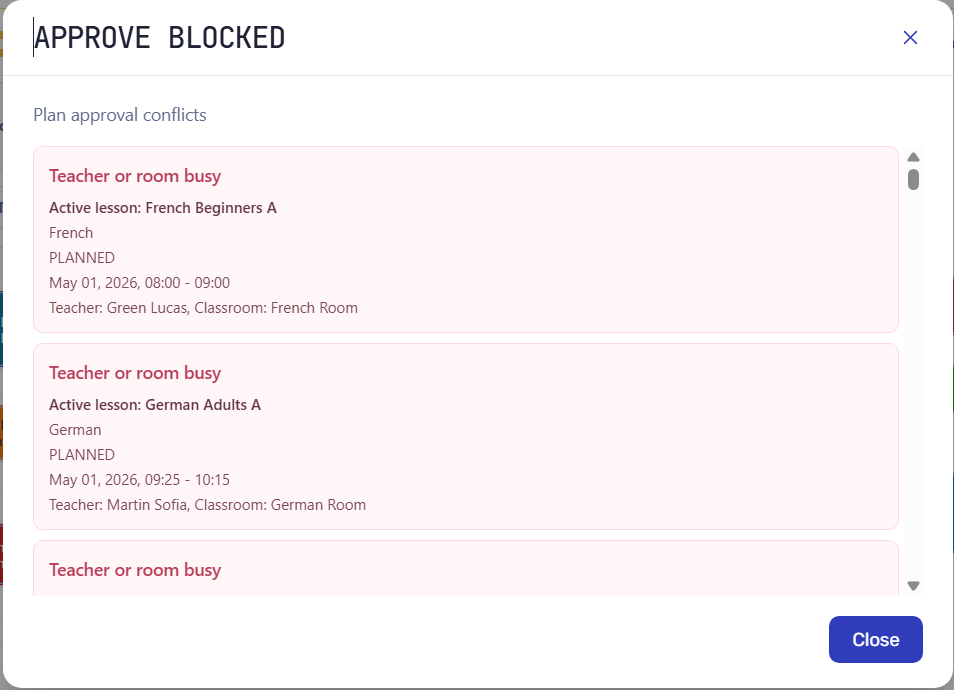
Check for overlapping teacher and room bookings. For example, if a teacher already has a lesson from 18:00 to 19:00, a second lesson from 18:30 to 19:30 needs a different time or teacher.
- If approval reports a conflict, find the lessons listed in the dialog.
- Change the time, teacher or room, then check again.
- Publish only when it is clear who can teach each lesson and where it will take place.
Approve and apply the version
When the lessons are ready, click “Approve and apply” and confirm. Return to the active schedule and make sure the lessons appear on the correct dates.
- Check the published week across several groups and teachers.
- If you use the student portal, check the schedule of one invited student.
- Staff can then open a lesson and mark attendance.
What to check after publishing
Open the published week and the related calculations to check that the intended lessons and prices were applied.
Sending an invoice and recording a payment are separate actions. Publishing the schedule does not replace them. Check charges and discounts before sending the invoice.
Common questions
Drafts, initial charges and the mobile schedule.
Does a draft change the active schedule or charges?
Changes in an edited version do not affect the active schedule until approval. To check the published result, open the active schedule and the corresponding student invoice.
Must attendance be marked before charges appear?
Initial charges appear after the schedule is published. Attendance records whether a student was present; billing treatment determines whether the lesson is chargeable. These settings are independent.
Can I use the schedule on a phone?
On a phone, you can view the selected day's lessons and open lesson details or attendance. A weekly view on a larger screen is useful for reviewing a large schedule version.