
How to Add Employees and Teachers and Manage Access
Add employees or teachers to Intelligence Cloud, assign the right access, and manage invitations without exposing unrelated school data.
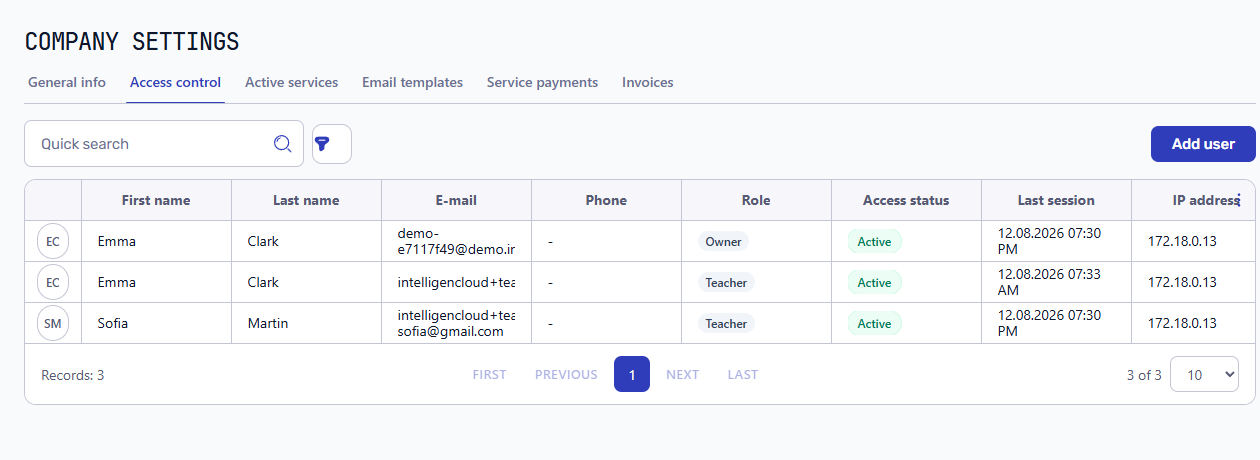
Use Company settings -> Access control when a new employee or teacher needs access to Intelligence Cloud, when responsibilities change, or when an account must be blocked or removed.
The current access flow separates two account types:
- Employee accounts receive one or more operational roles selected by the administrator.
- Teacher accounts are connected to an existing teacher in the school directory and receive a dedicated view of their own teaching records.
Student portal accounts are managed separately from both staff account types.
Review the current access list
Open Company settings and select Access control. The list shows each staff account, its role, current access status, last session, and IP address. Use quick search before adding a user so an existing account is not invited twice.
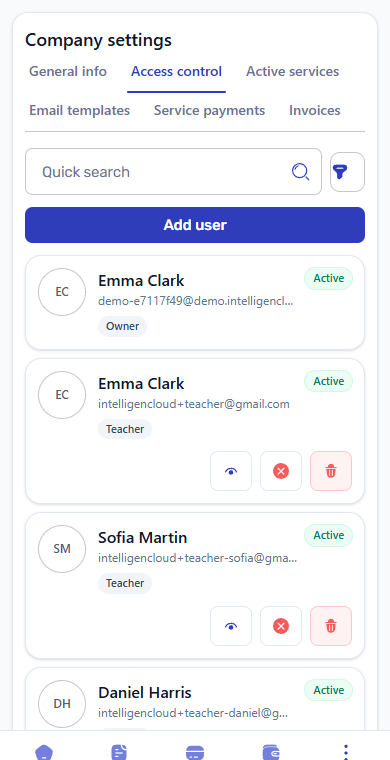
On a narrow screen the same records are presented as cards rather than a compressed table. The role and access status remain visible for each user.
Choose Employee or Teacher
Click Add user and choose the access type before entering or selecting the person.
Choose Employee for an owner, school manager, attendance manager, billing manager, reporting user, payroll manager, or catalog manager. Employee access areas can be combined when one person performs several administrative jobs.
Choose Teacher only for a person who already has a teacher profile in People & Classes -> Teachers. Teacher access is linked to that directory record and cannot be combined with employee roles in the same account.
This separation matters because a teacher should see their own schedule, attendance work, groups, and payout information without receiving unrelated school administration or finance permissions.
Add an employee and select access areas
With Employee selected:
- Select one or more access areas in Role.
- Enter the employee's name, surname, and email address.
- Add optional contact details or an avatar where useful.
- Click Add user.
- Verify that the account appears in the access list with the expected roles and invitation status.
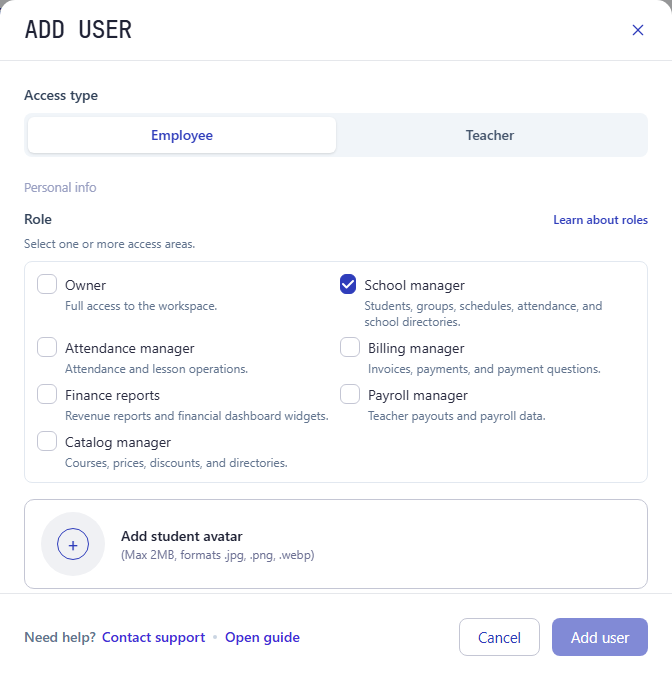
Available employee access areas include:
- Owner for full workspace control;
- School manager for schedules, attendance, school directories, courses, discounts, and the birthday report; company settings and employee access management require Owner;
- Attendance manager for lesson and attendance operations;
- Billing manager for invoices, payments, and payment questions;
- Finance reports for revenue reports and revenue by group;
- Payroll manager for teacher payout information;
- Catalog manager for courses, prices, discounts, and directories.
Start with the smallest combination that supports the person's work. Do not grant owner access as a shortcut during onboarding.
Grant access to an existing teacher
Teacher access uses the teacher directory as its source of identity. The teacher profile must already exist, be active, and contain the email address that will be used for sign-in.
There are two valid entry points:
- In Company settings -> Access control, click Add user, select Teacher, and choose the person in Directory teacher.
- Open the teacher profile and use Grant access in the Backoffice access section.
Both paths create the same linked teacher account and send the shared staff invitation email. Follow the dedicated guide for screenshots, prerequisites, invitation states, and recovery actions: grant a teacher access to the school backoffice.
Understand access statuses and actions
After an invitation is sent, the access list and linked profile show its current state:
- Invitation sent / Invited means the email was sent but password setup has not been completed.
- Active means the user has completed setup and can sign in.
- Blocked means sign-in is temporarily disabled without deleting the linked school records.
- Invitation failed means delivery failed and the email address or delivery error should be checked before resending.
Use Resend invitation when a setup link has expired or the recipient cannot find the original email. A new setup link invalidates the previous one. Use Block access for a temporary restriction and Remove access when the login identity should be removed. Removing teacher access does not delete the teacher profile, lessons, attendance, or payout history.
Configure the invitation wording once
Employee and teacher invitations use the shared Staff access invitation template. The company owner can customize its subject and body in Company settings -> Email templates.
Keep the message suitable for every staff account type. It should explain that the recipient is being invited to the school backoffice, include the setup link, and avoid promising access to a section that only one role can see. See how to configure email templates for all available placeholders.
Protect operational and financial data
Role-based access is especially important for:
- student personal data;
- attendance and billing records;
- payments and student balances;
- discounts and pricing rules;
- teacher payout calculations;
- reports and financial summaries;
- staff management and company settings.
Review access when responsibilities change and remove or block it promptly when a staff member leaves. Student portal access follows a separate lifecycle; see how to invite a student and manage portal access.
For the product overview, see access control for school management software. For the wider operational model, continue with training center automation.
Related resources
Training center automation software
A practical guide to replacing spreadsheets with connected scheduling, attendance, student billing, payments, teacher payouts, and reports.
How to Configure Email Templates for Your School
Step-by-step instructions for customizing student invoice emails, teacher payout calculations, student portal invitations, and staff access invitations in Intelligence Cloud.
How to Give a Teacher Access to the School System
Connect an existing teacher profile to a restricted staff account, send the invitation, and manage activation, blocking, and removal.
How to Invite Students to the Student Portal and Manage Access
Step-by-step instructions for inviting a student, checking activation, resending an invitation, deactivating access, and inviting the student again.