
How to Grant a Teacher Access to the School Backoffice
Connect an existing teacher profile to a restricted staff account, send the invitation, and manage activation, blocking, and removal.
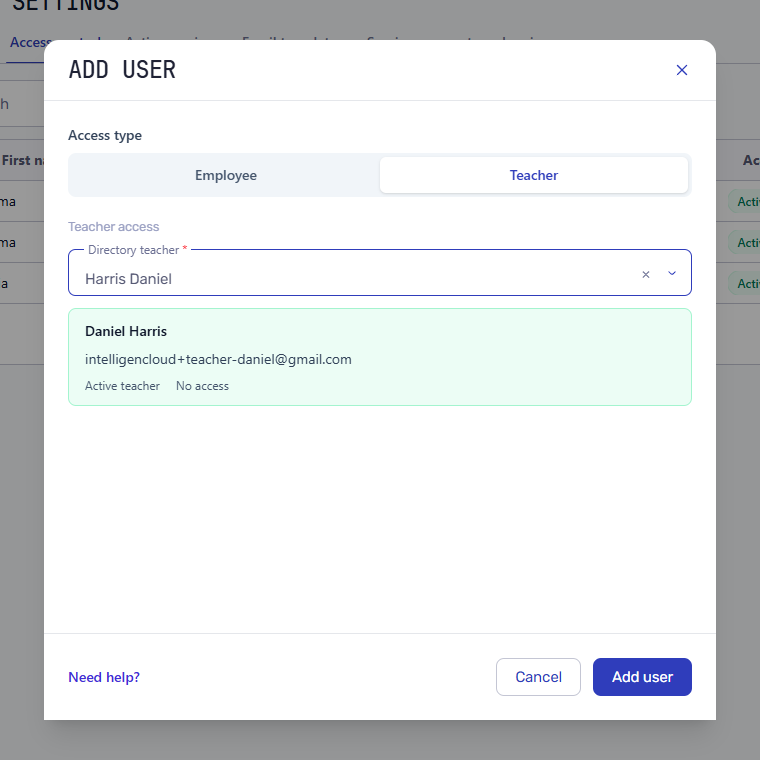
Teacher access is not a generic employee role. Intelligence Cloud links the login account to an existing teacher profile so the teacher can work with their own schedule, groups, attendance records, and payout information without receiving unrelated administration permissions.
This guide covers the administrator side: prepare the teacher record, send the invitation from either supported entry point, verify delivery and activation, and manage access later.
Before granting access
Check the teacher profile first:
- the teacher already exists in People & Classes -> Teachers;
- the teacher record is active and has no terminate date in the past;
- the profile contains the email address the teacher will use to sign in;
- the email is not already attached to another staff account;
- the teacher does not already have active or pending access.
The email is read from the teacher profile. The access form does not create a second teacher identity and does not let the administrator type a different login address for the same teacher.
The owner can also customize the reusable Staff access invitation before sending it. See how to configure school email templates.
Option 1: grant access from the teacher profile
Open People & Classes -> Teachers, find the teacher, and open the profile. The Backoffice access section shows No access when no login identity is linked.
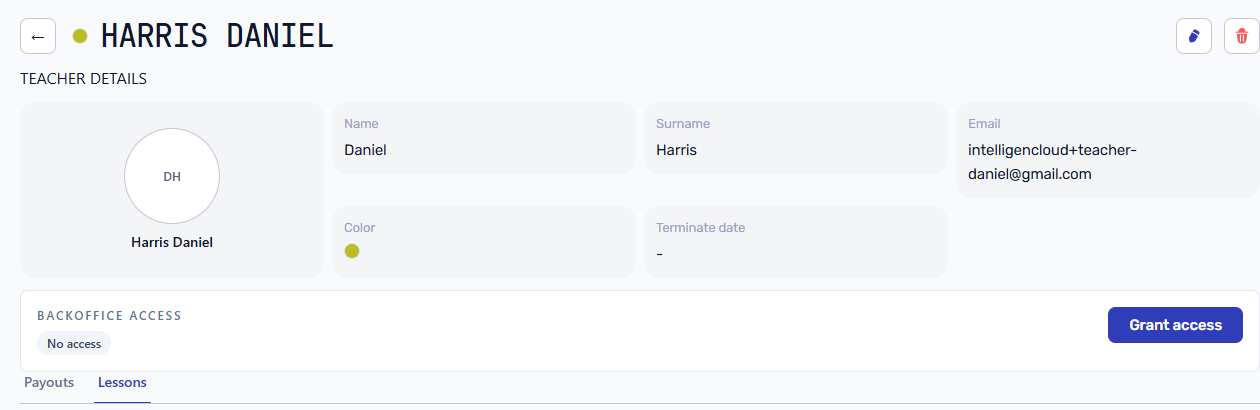
Click Grant access and confirm the invitation. This is the shortest path when the administrator is already reviewing the teacher's lessons, categories, or payout data.
Option 2: add the teacher from Access control
Open Company settings -> Access control and follow these steps:
- Click Add user.
- Select Teacher under Access type.
- Open Directory teacher and search for the teacher.
- Select the matching directory record.
- Check the teacher name, login email, active teacher status, and current access status.
- Click Add user.
The green summary confirms that the selected record is an active teacher and currently has no account. If the email is missing, the teacher is terminated, or access already exists, open the teacher profile and fix the underlying record instead of creating a duplicate.
Confirm that the invitation was sent
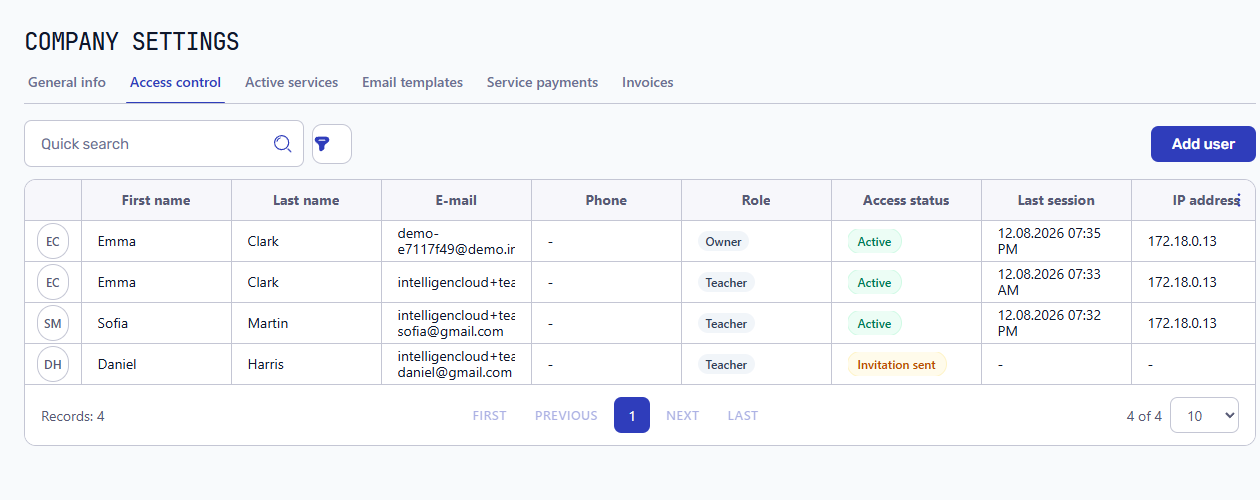
After a successful request, the teacher appears in Access control with role Teacher and status Invitation sent.
The linked teacher profile shows the same state as Invited, together with the login email, invitation date, and delivery result.
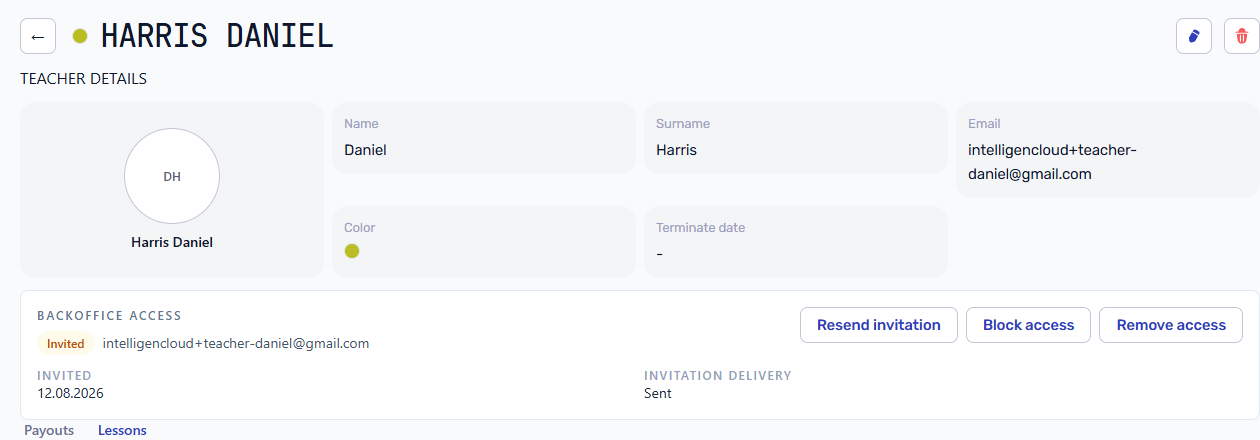
Invited does not mean the teacher has signed in. It means the invitation email was sent and the system is waiting for password setup.
What the teacher does next
The teacher opens the setup link from the invitation, creates a password, and then signs in with the invited email address and that password.
The setup link is single-use. If it has expired or was already opened, use Resend invitation rather than creating another teacher or staff record. A newly sent setup link replaces the previous one.
After password setup and the first successful sign-in, the teacher profile and access list show Active.
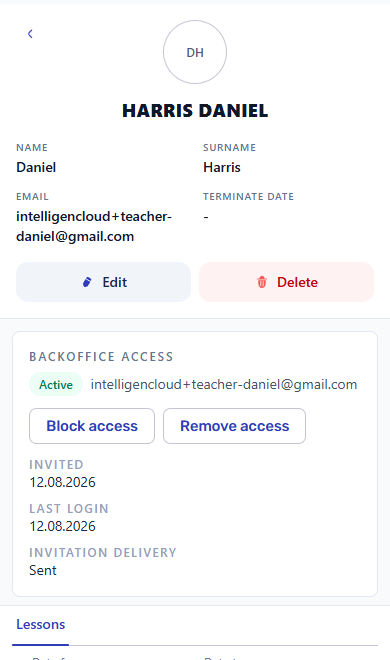
Manage teacher access after invitation
The teacher profile keeps the access lifecycle next to the teacher's operational history:
- Resend invitation sends a new setup link while the account is still invited.
- Block access stops sign-in without deleting the teacher profile or school records.
- Restore access re-enables a blocked account.
- Remove access removes the login identity without deleting lessons, attendance, groups, or payouts.
Use blocking for a temporary restriction. Use removal when the person should no longer have a login account. If access is needed again later, grant it from the same teacher profile rather than creating a duplicate teacher.
What teacher access includes
After activation, the teacher receives a personal teaching workspace with:
- a dashboard summarizing their own upcoming and recent lessons;
- their own schedule and assigned groups;
- attendance entry for lessons they teach;
- their own calculated payout statements.
Administrative routes such as the full student directory are not opened by the Teacher access type. The next manual explains the teacher's side of this workflow: review lessons, mark attendance, and check payouts as a teacher.
For employee roles and the difference between Employee, Teacher, and student portal accounts, read how to add staff and manage access roles.
Related resources
How to Add Employees and Teachers and Manage Access
Add employees or teachers to Intelligence Cloud, assign the right access, and manage invitations without exposing unrelated school data.
How to Configure Email Templates for Invoices and Access Invitations
Step-by-step instructions for customizing student invoice emails, student portal invitations, and staff access invitations in Intelligence Cloud.
How Teachers Review Lessons, Mark Attendance, and Check Payouts
Sign in with a teacher account, review the personal schedule, record lesson attendance, and check calculated teacher payouts.