
How to Invite Students to the Student Portal and Manage Access
Step-by-step instructions for inviting a student, checking activation, resending an invitation, deactivating access, and inviting the student again.
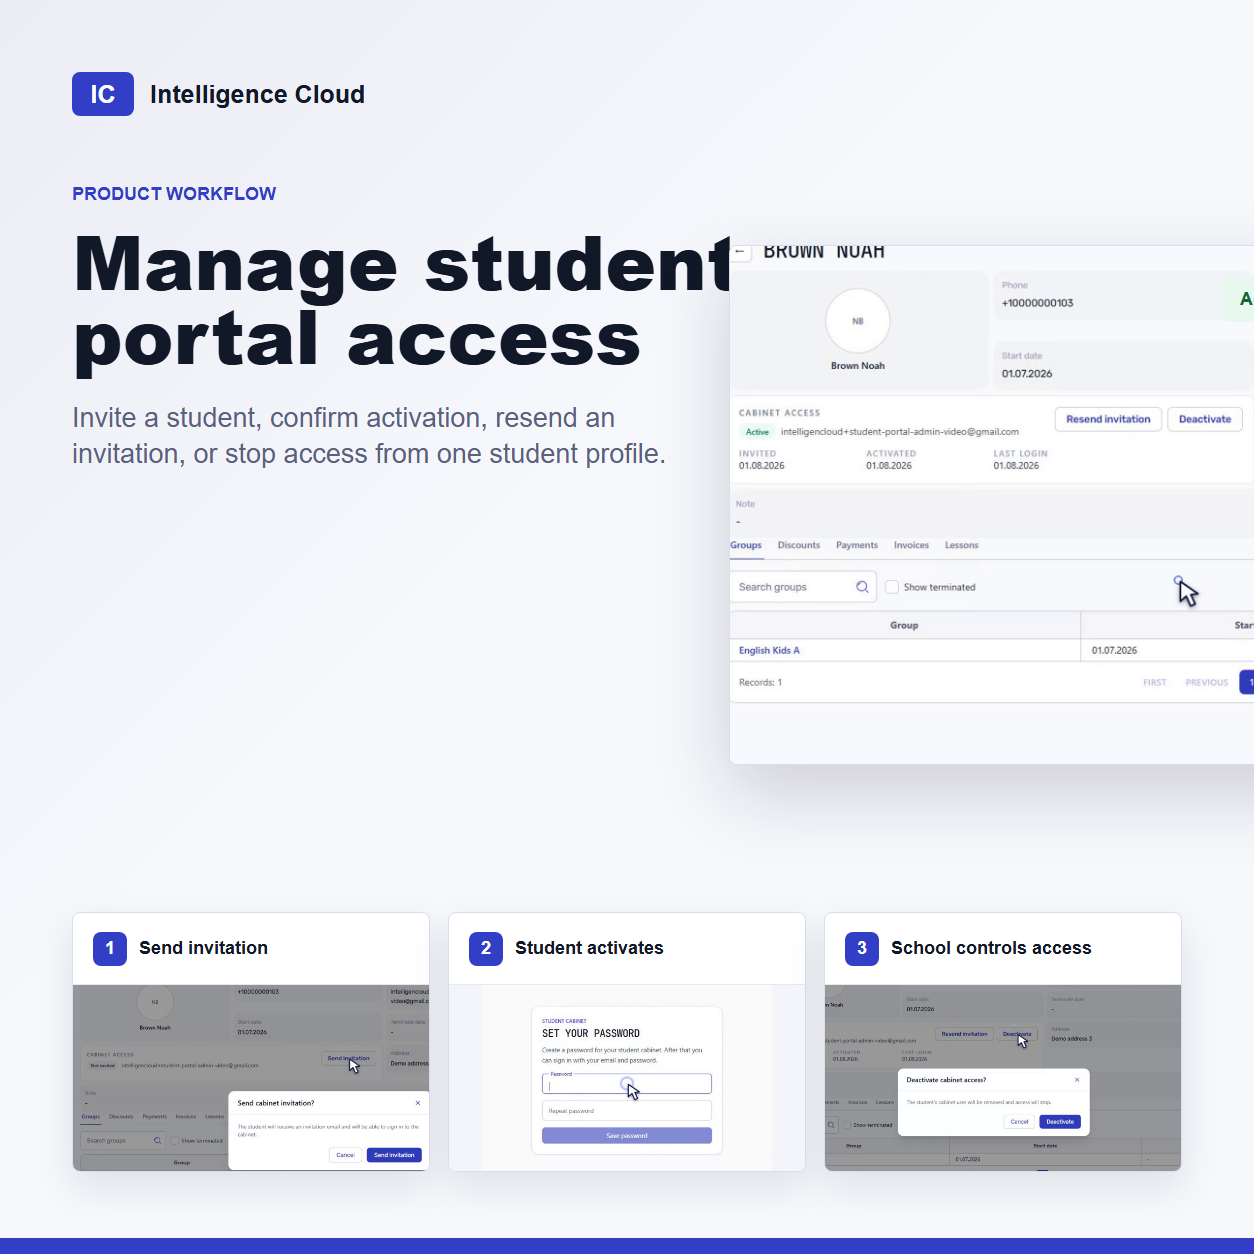
The Intelligence Cloud student portal is included in every active plan, but student accounts are not created automatically. A school employee decides which student receives access and can stop that access later.
This guide covers the administrator side of the workflow: send the first invitation, understand the access status, resend an invitation, and deactivate access. The separate student-facing guide explains what the student sees after signing in.
Before you send an invitation
Check the student record before starting:
- the student already exists in Intelligence Cloud;
- the profile has the student's current email address;
- the same email is not being used for another student portal account;
- the student record is active and has not been terminated;
- you are signed in with permission to update student records.
The email matters because the invitation and future sign-in use that address. Correct it before sending the invitation if the address is missing or outdated.
The company owner can change the reusable invitation subject and message before the administrator sends it. Follow how to configure email templates and select Student cabinet invitation.
Open the student profile
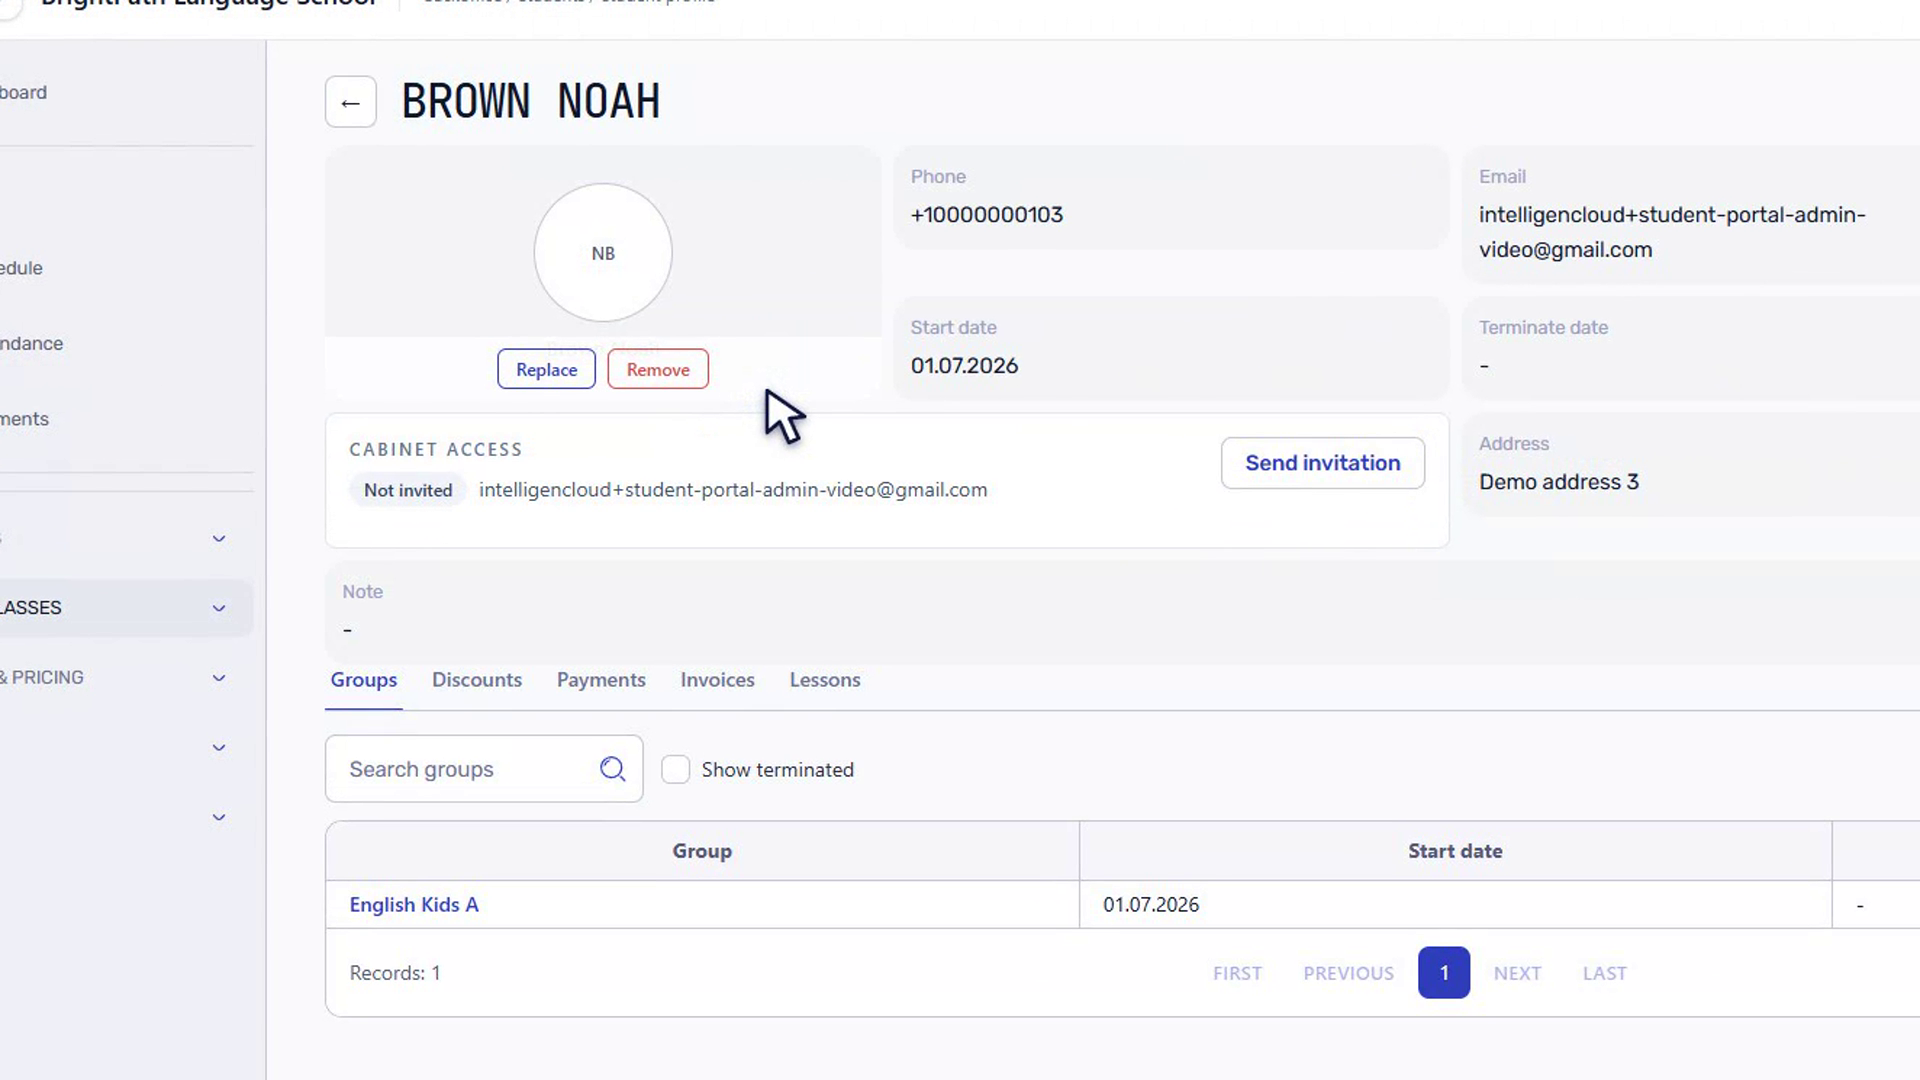
Open People & Classes -> Students, find the student, and open their profile. The Cabinet access panel shows the email used for the portal, the current status, and the actions available to the administrator.
A student who has never received portal access has the status Not invited and the Send invitation action.
Send the first invitation
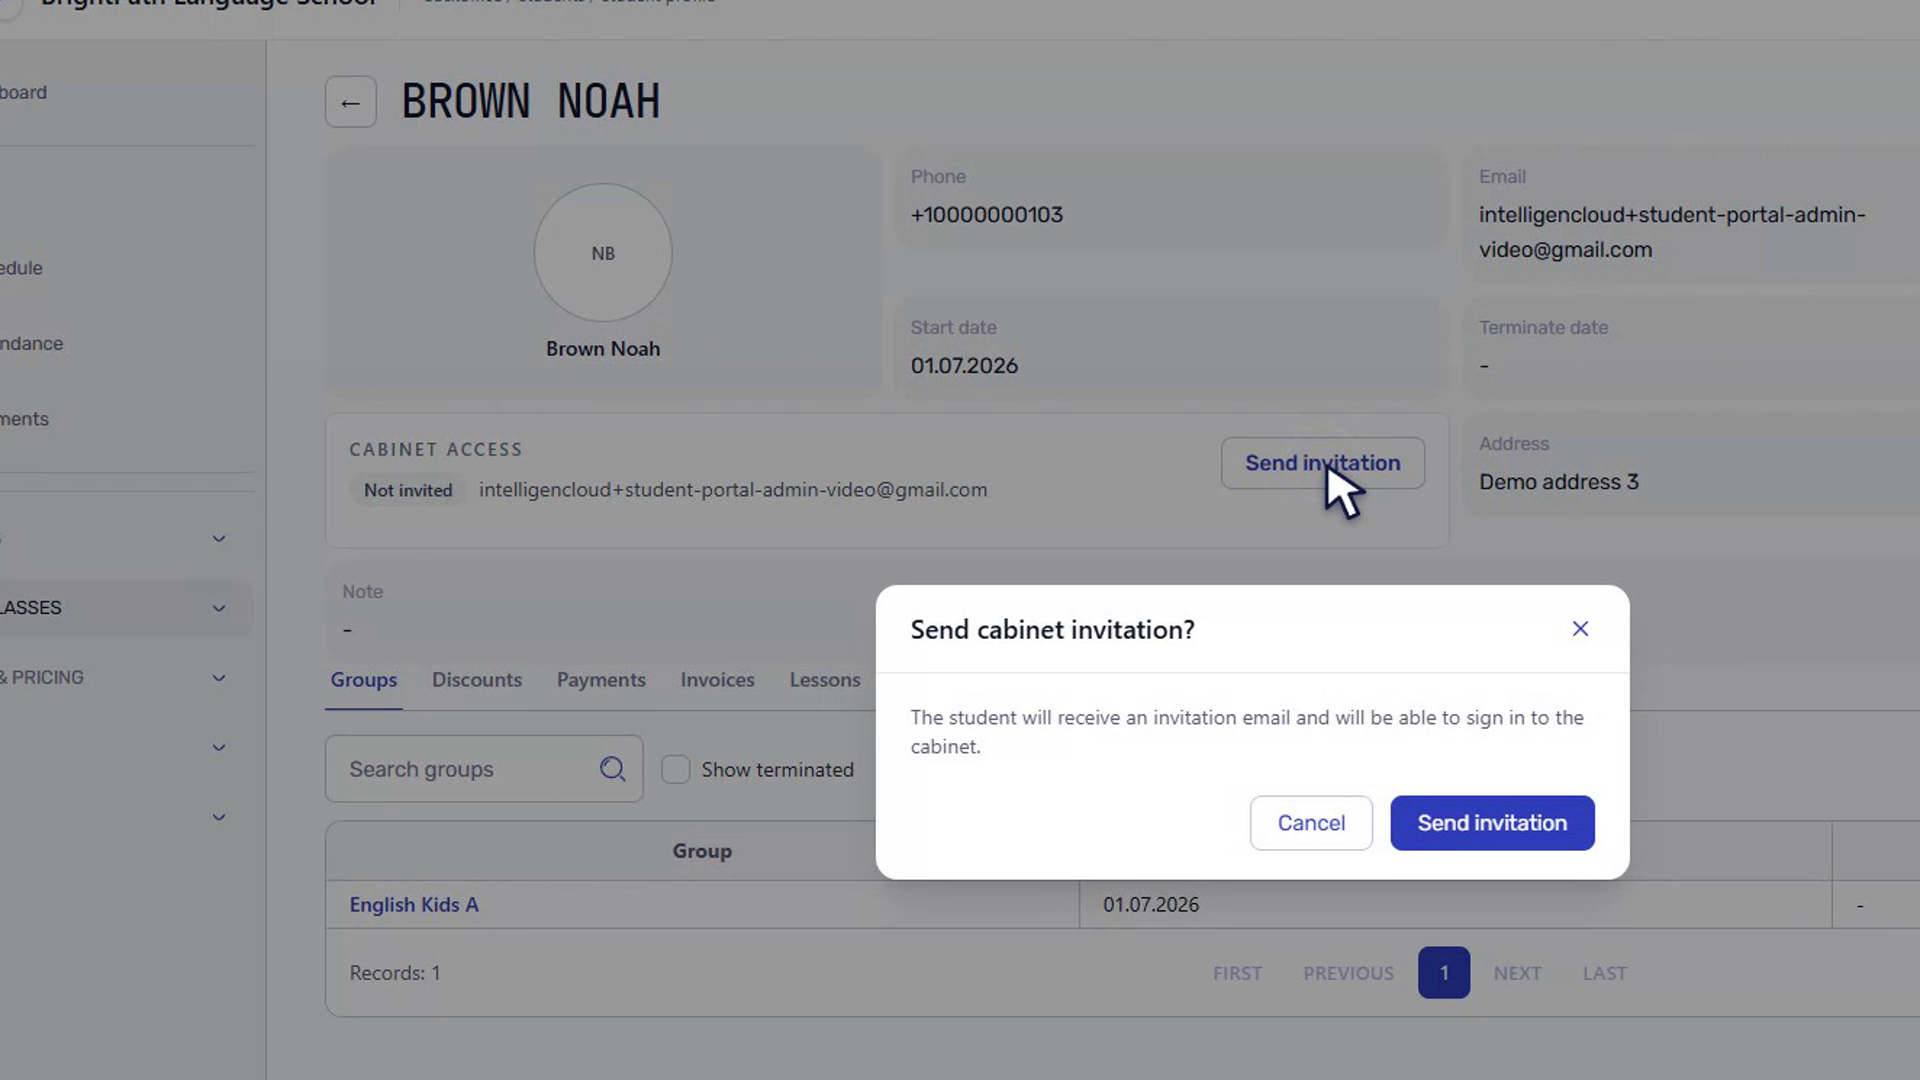
Click Send invitation. The confirmation dialog explains that the student will receive an invitation email and will be able to sign in to the portal. Confirm with Send invitation only after checking the email shown in the student profile.
After the request succeeds, the status changes to Invited. The panel records the invitation date and provides Resend invitation and Deactivate actions.
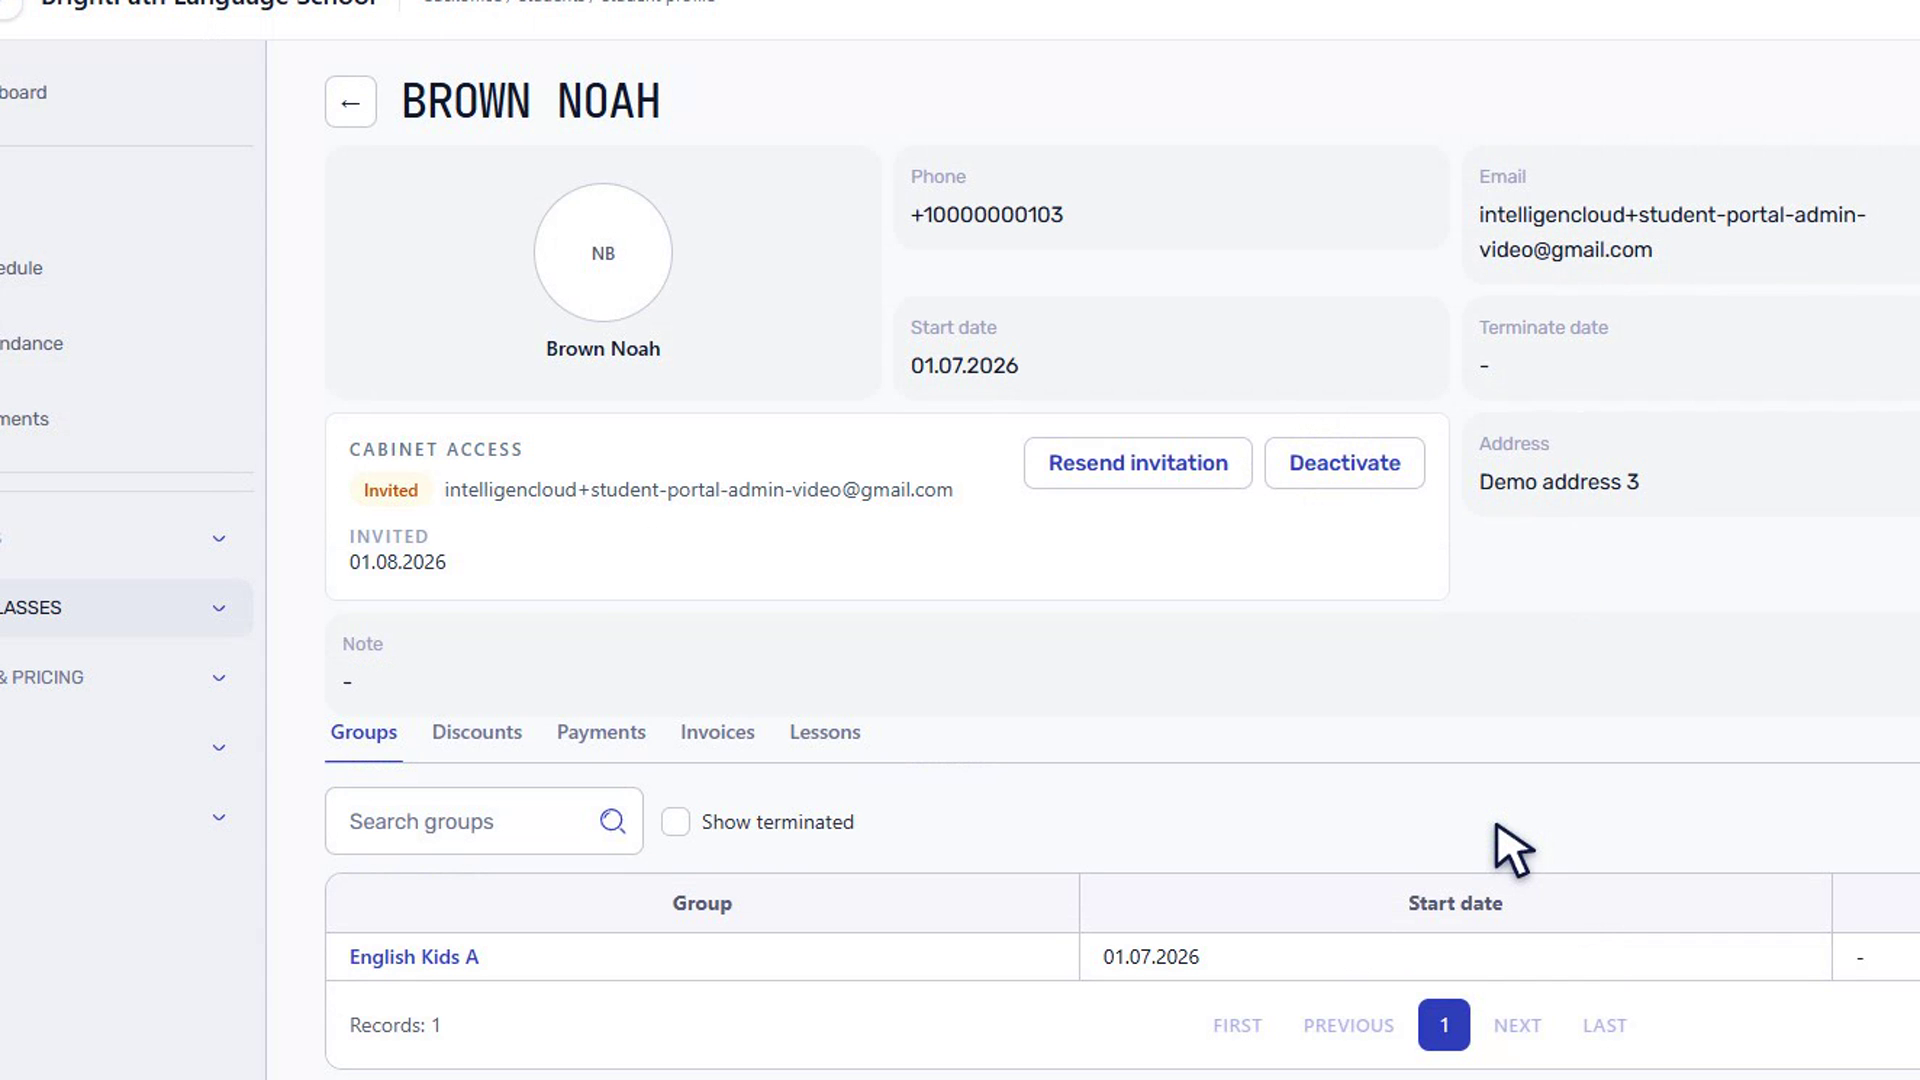
Invited does not mean that the student has already opened the portal. It means the school sent the invitation and is waiting for the student to finish account setup.
What the student does with the invitation
The student opens the invitation link and creates a password for the portal account. After saving the password, the student can sign in with the invited email and the new password.
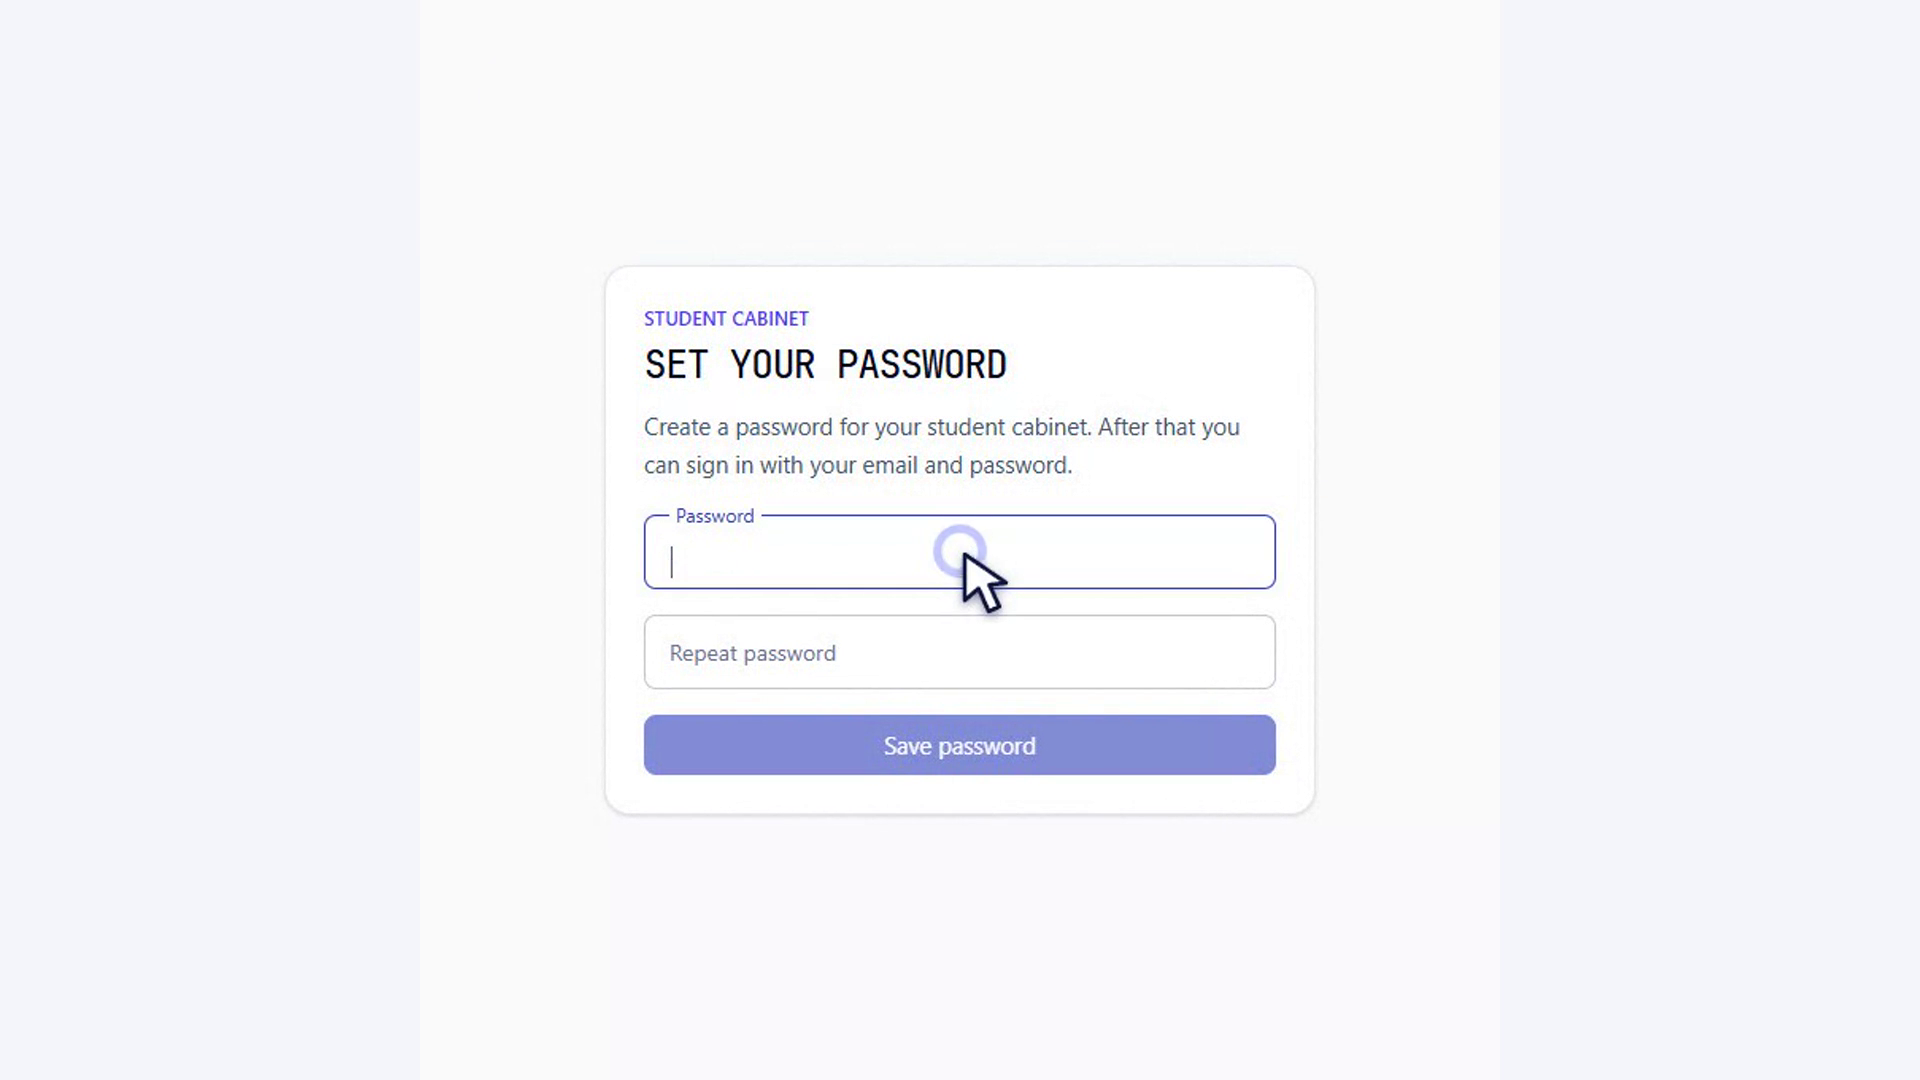
Do not create a second student record when the student cannot find the email or the link is no longer usable. Use Resend invitation from the existing profile instead.
Check whether access is active
After the student completes setup and successfully accesses the portal, the status becomes Active. The access panel shows:
- Invited: when the school sent the invitation;
- Activated: when the student account became active;
- Last login: the latest recorded portal sign-in.
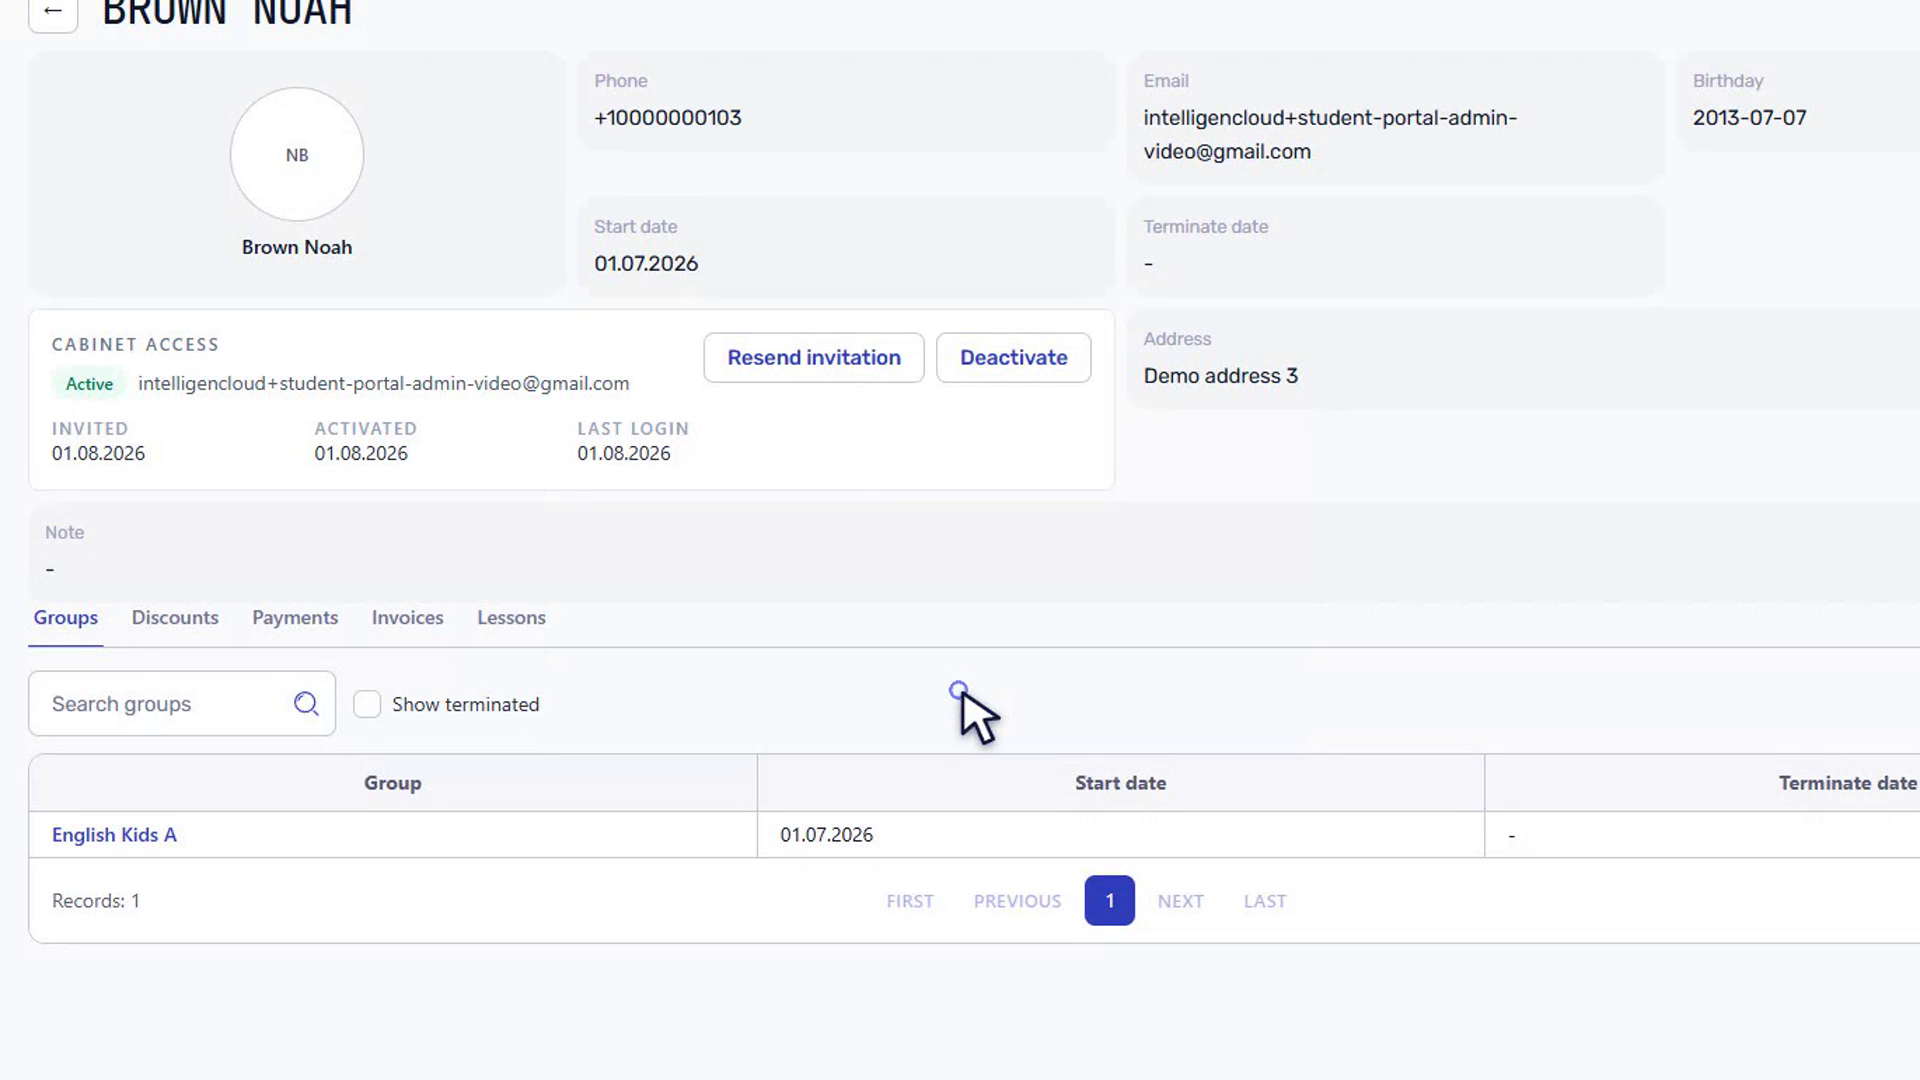
Use these fields to distinguish an invitation problem from a later sign-in problem. If the status is still Invited, the student has not completed activation. If the status is Active, the account has already been activated.
Resend an invitation
Use Resend invitation when the student did not receive the first email or needs a new setup message. Confirm the action in the dialog to send a new invitation to the email displayed in the access panel.
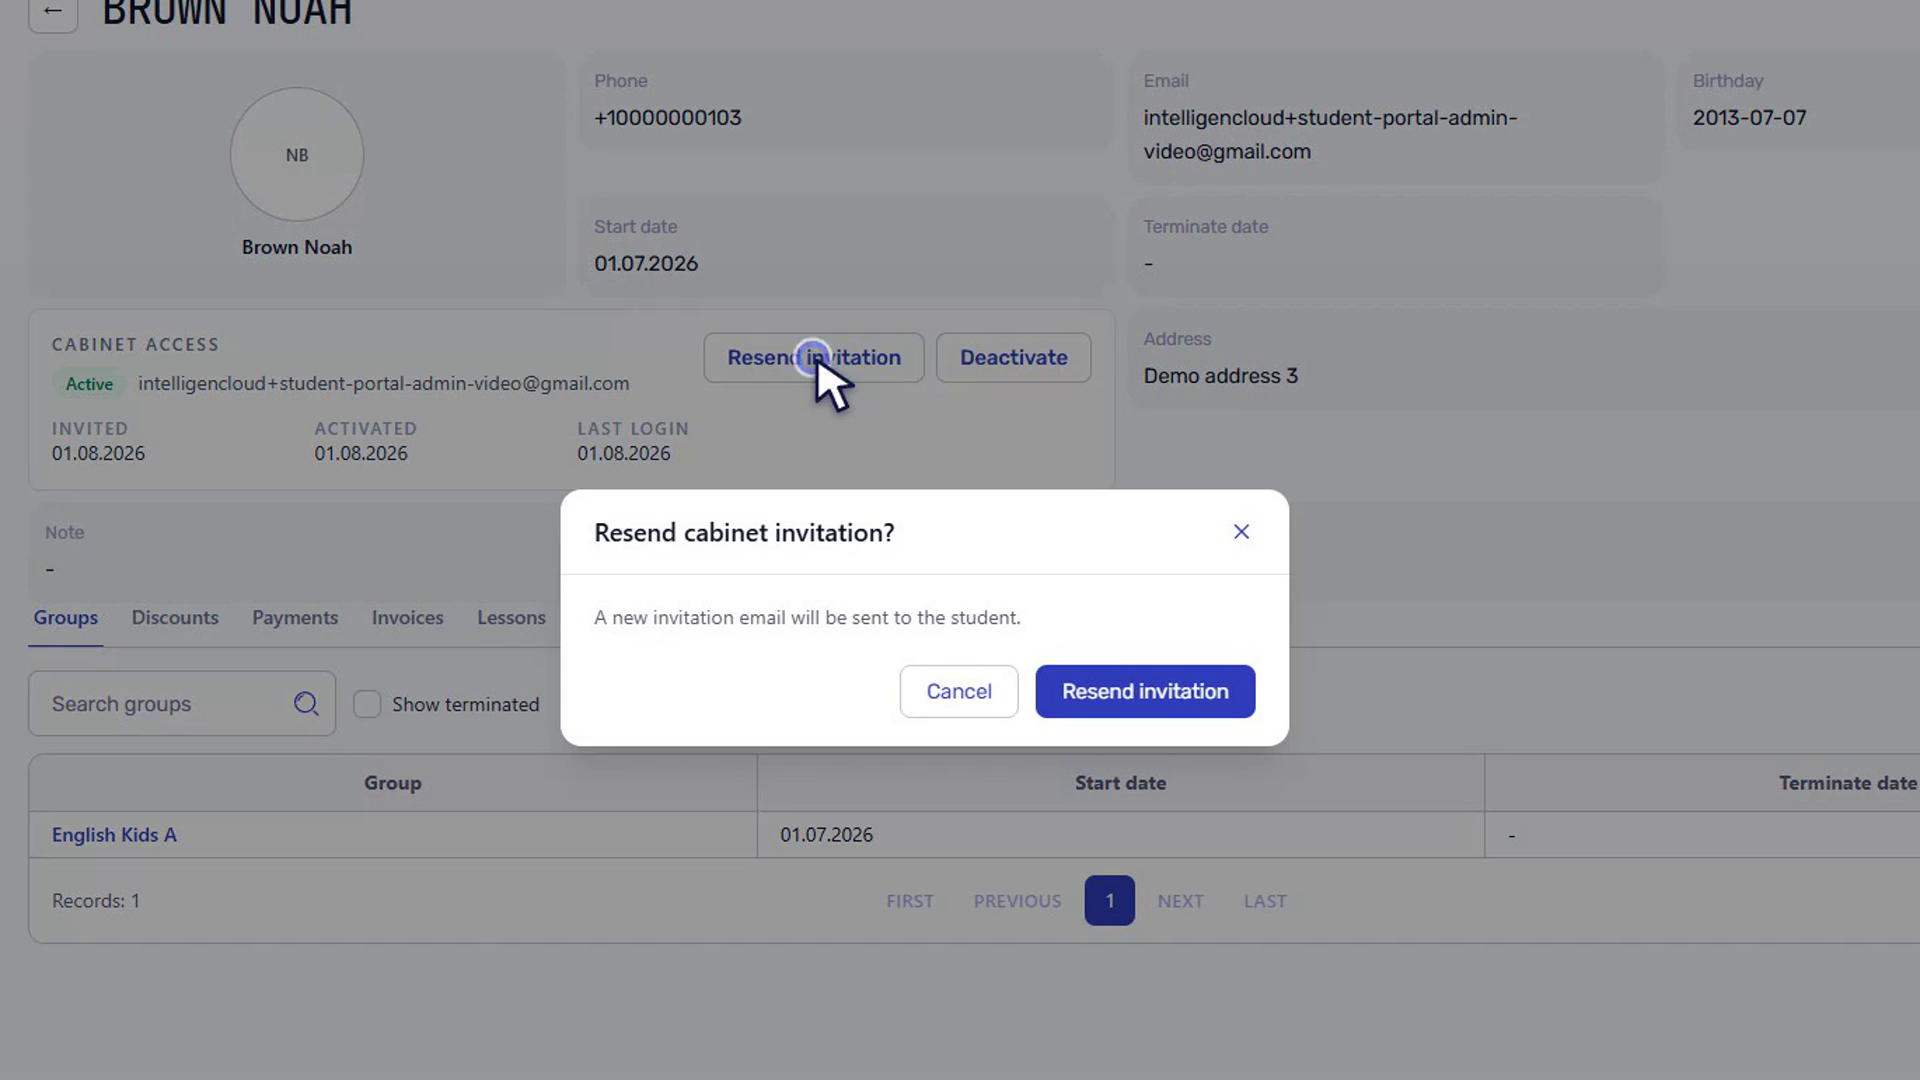
Before resending, ask the student to check the spam folder and verify the email in the profile. Repeatedly sending to an incorrect address will not solve the access problem.
Deactivate student portal access
Click Deactivate when the student should no longer be able to use the portal. The confirmation dialog states that the portal user will be removed and access will stop.
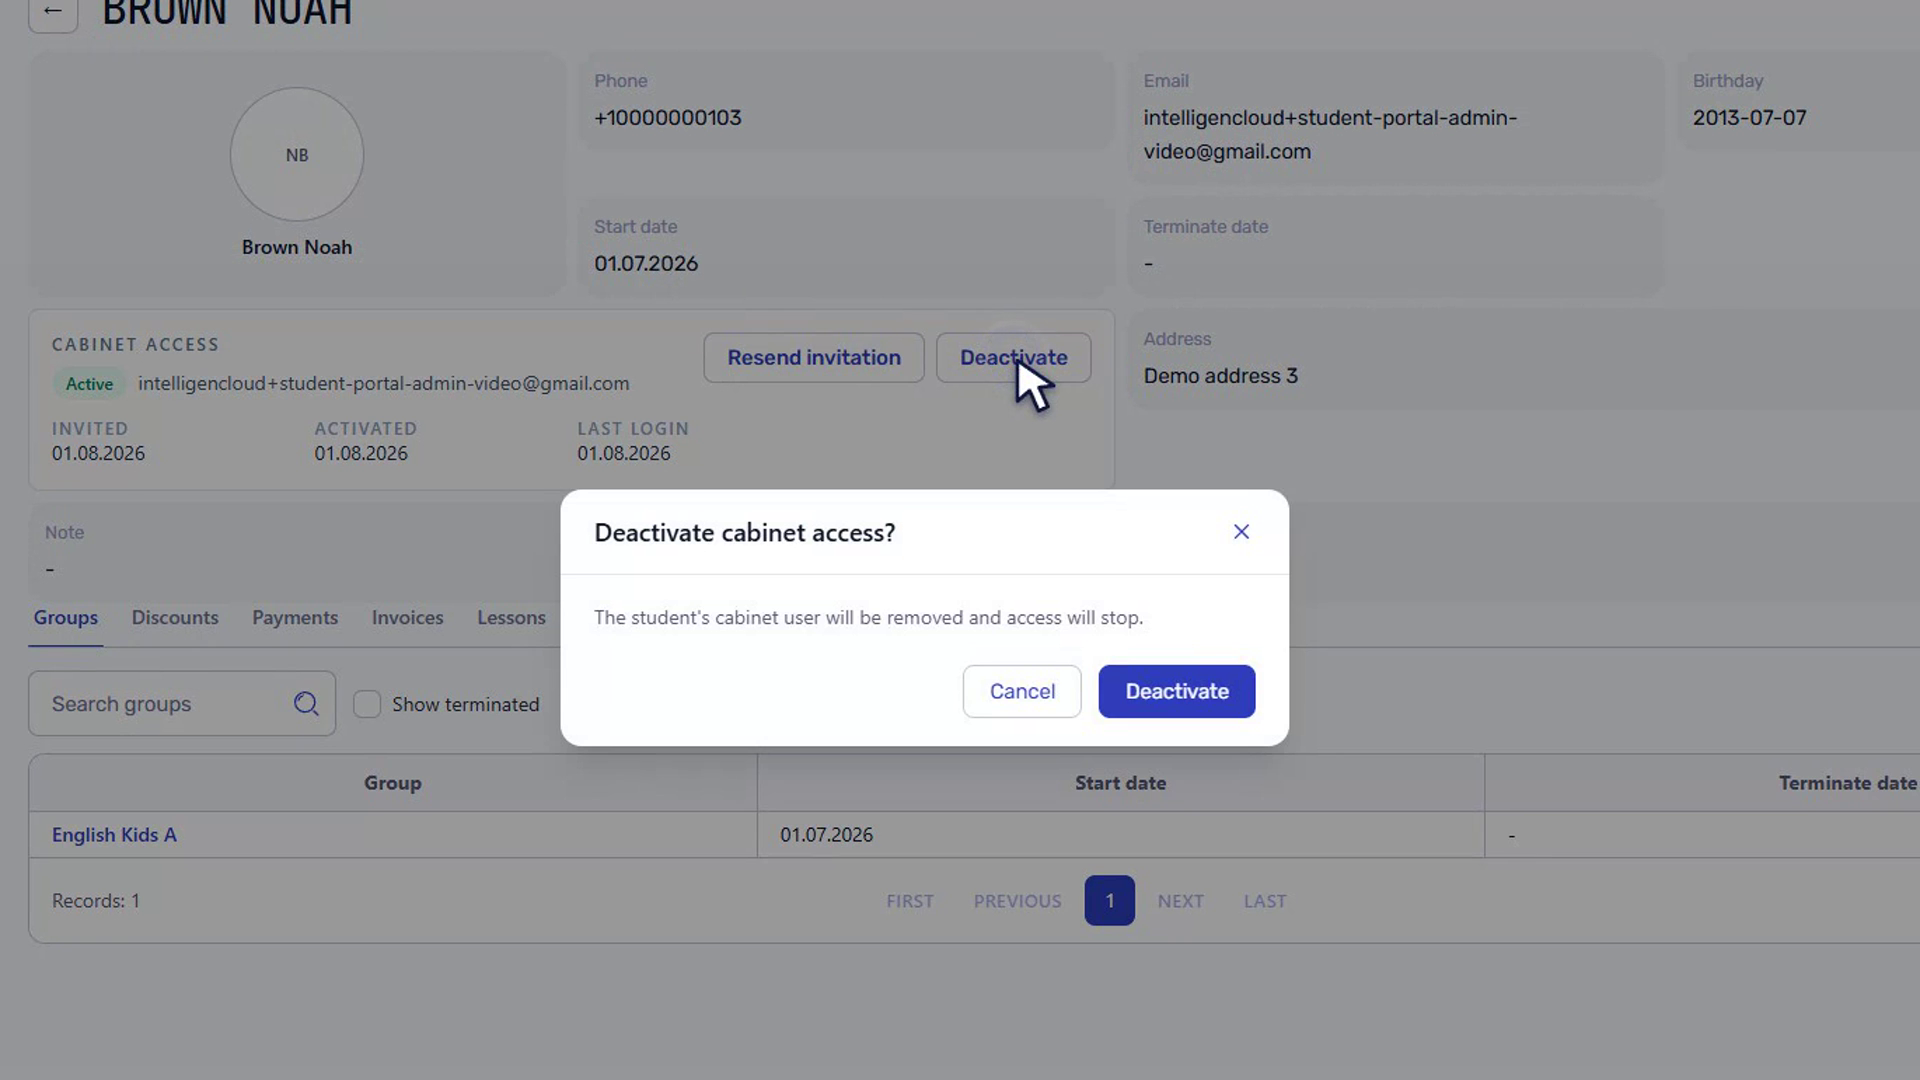
Deactivation affects the portal account, not the school's operational history. It does not remove the student profile, lessons, attendance, invoices, payments, or balance records from Intelligence Cloud.
After confirmation, the status changes to Deleted and the deletion date is recorded. The Send invitation action becomes available again if the school later decides to restore access.
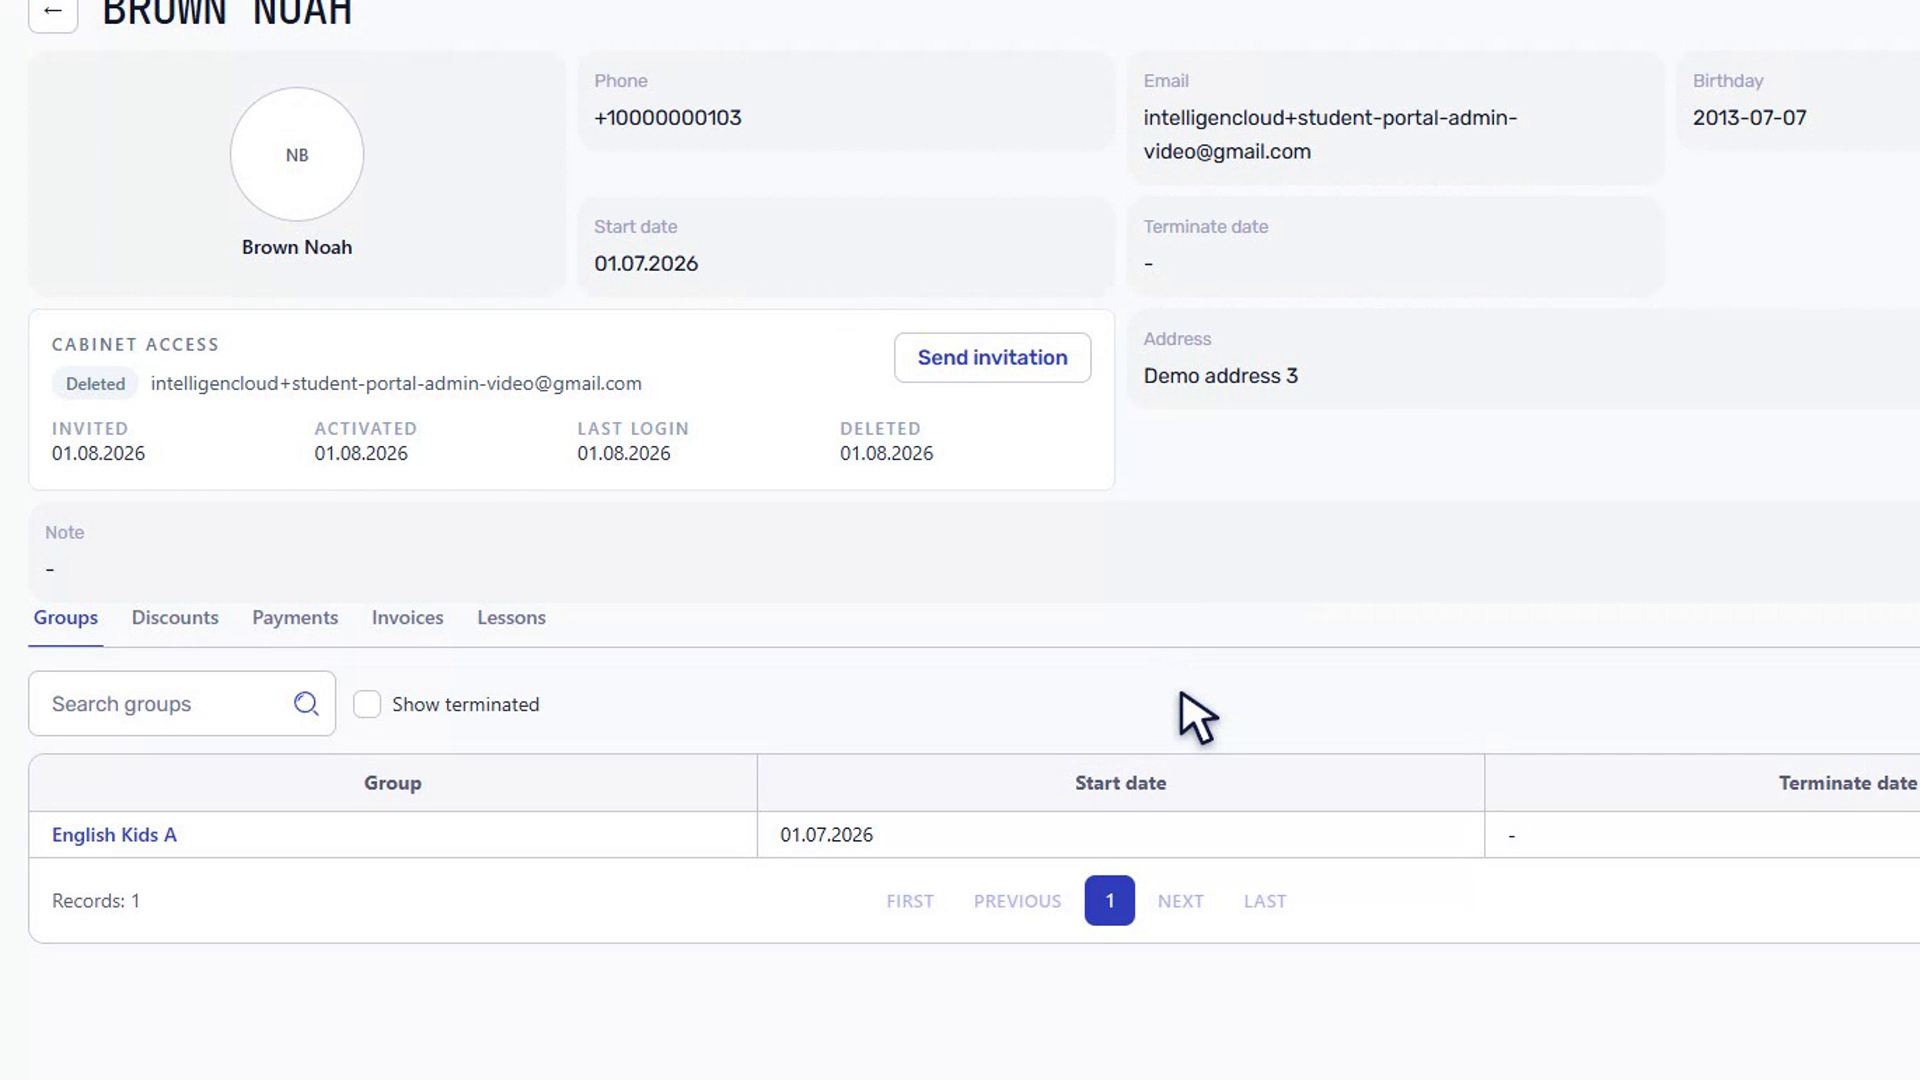
Student portal access statuses
- Not invited: the school has not sent an invitation for this student.
- Invited: an invitation was sent, but activation has not been completed.
- Active: the student completed setup and has an active portal account.
- Deleted: the school deactivated the portal account; the student can be invited again later.
These statuses describe portal access only. They do not change the student's enrollment, group membership, lesson history, or financial records.
What students can access
Each authenticated student is limited to their own portal records. Depending on the records already prepared by the school, the portal can show:
- upcoming and completed lessons;
- attendance recorded for those lessons;
- invoices sent by the school and their PDF files;
- payment history already recorded by the school;
- the student's own profile information.
Draft and unsent invoices stay outside the portal. The student portal is a secure view of selected school records, not a second place where administrators rebuild data.
Troubleshooting
The student did not receive the invitation
Verify the email on the student profile, ask the student to check spam, and use Resend invitation. Do not create a duplicate student.
The status remains Invited
The student has not completed activation. Ask them to open the latest invitation and save a password.
The student was active but should no longer have access
Use Deactivate in the Cabinet access panel. The student's school records remain available to authorized staff.
The student needs access again after deactivation
Use Send invitation on the profile with Deleted status. Check the email before sending the new invitation.
For the student's next steps after activation, share how to use the student portal. For the commercial overview of lessons, attendance, invoices, payments, and profile data available to students, see student portal software. For employee roles and workspace permissions, read access control for training centers.
Related resources
How to send student invoices by email
Learn how Intelligence Cloud sends student invoice PDFs by email, uses invoice due dates, and inserts school payment details into the message.
What is Intelligence Cloud?
Intelligence Cloud is school management software for private education providers that connects scheduling, attendance, student billing, payments, reports, and teacher payouts.
How to Add Employees and Teachers and Manage Access
Add employees or teachers to Intelligence Cloud, assign the right access, and manage invitations without exposing unrelated school data.
How to Configure Email Templates for Invoices and Access Invitations
Step-by-step instructions for customizing student invoice emails, student portal invitations, and staff access invitations in Intelligence Cloud.